Step 1: Add Throney to Your Server
Invite Throney
Click here to invite Throney to your Discord server and begin the setup process.
Need Support?
Join our support server for help, feature requests, and the latest updates!
Important: You must have
Admin permissions in your Discord server to set up Throney.Step 2: Set Up Roles for Throney
After adding Throney, create a dedicated role that will serve as the “Officer” role. This role grants access to the Throney Dashboard for managing your guild and alliance.Required Roles & Permissions
| Role | Description |
|---|---|
| 🎖️ Alliance Officer | Full access to the dashboard and all guilds. |
| ⚔️ Guild Officer | Manage a specific guild’s dashboard and commands. |
| 👥 Member | Required for assigning users to a guild. |
Step 3: Initialize Throney in Your Server
Once roles are created, use the following command in Discord to start the setup process:-
Select the newly created Alliance Officer role.
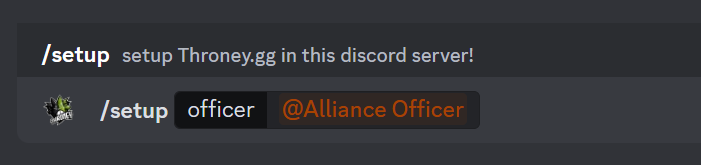
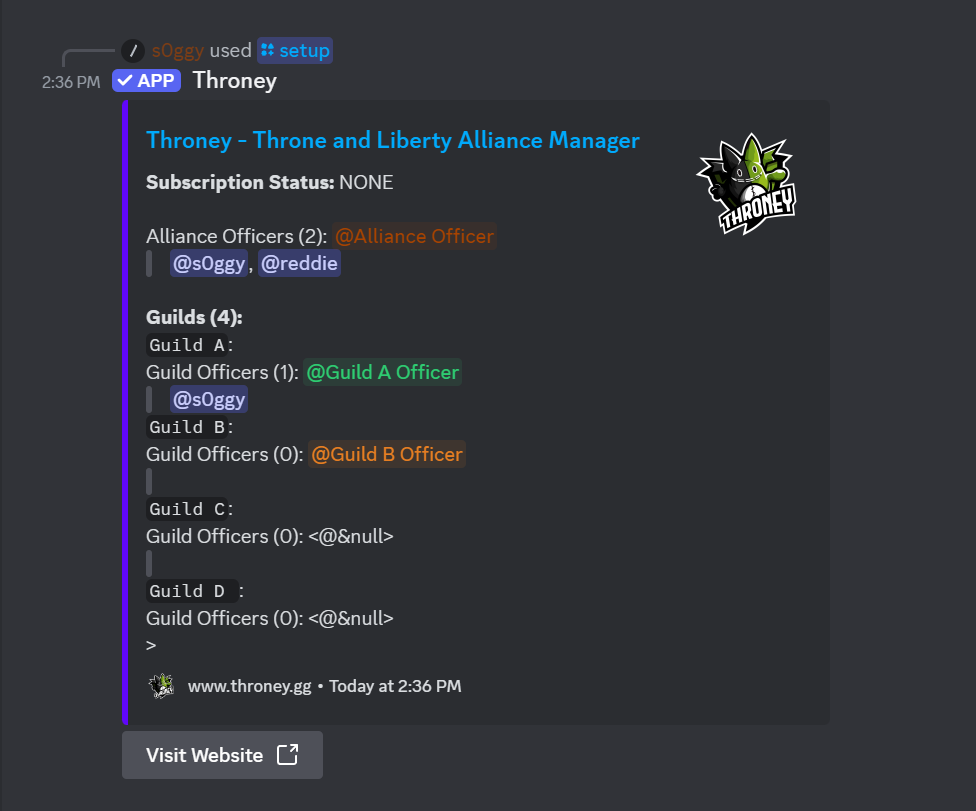
- This will activate your 2-week trial of Throney.
- You will see a setup confirmation panel like this:
Note: After the trial period, a subscription will be required to continue using Throney.
Step 4: Access the Dashboard
Once setup is complete, head over to the Throney Dashboard and log in.- Click on your Alliance.
- You will see an interface similar to this:
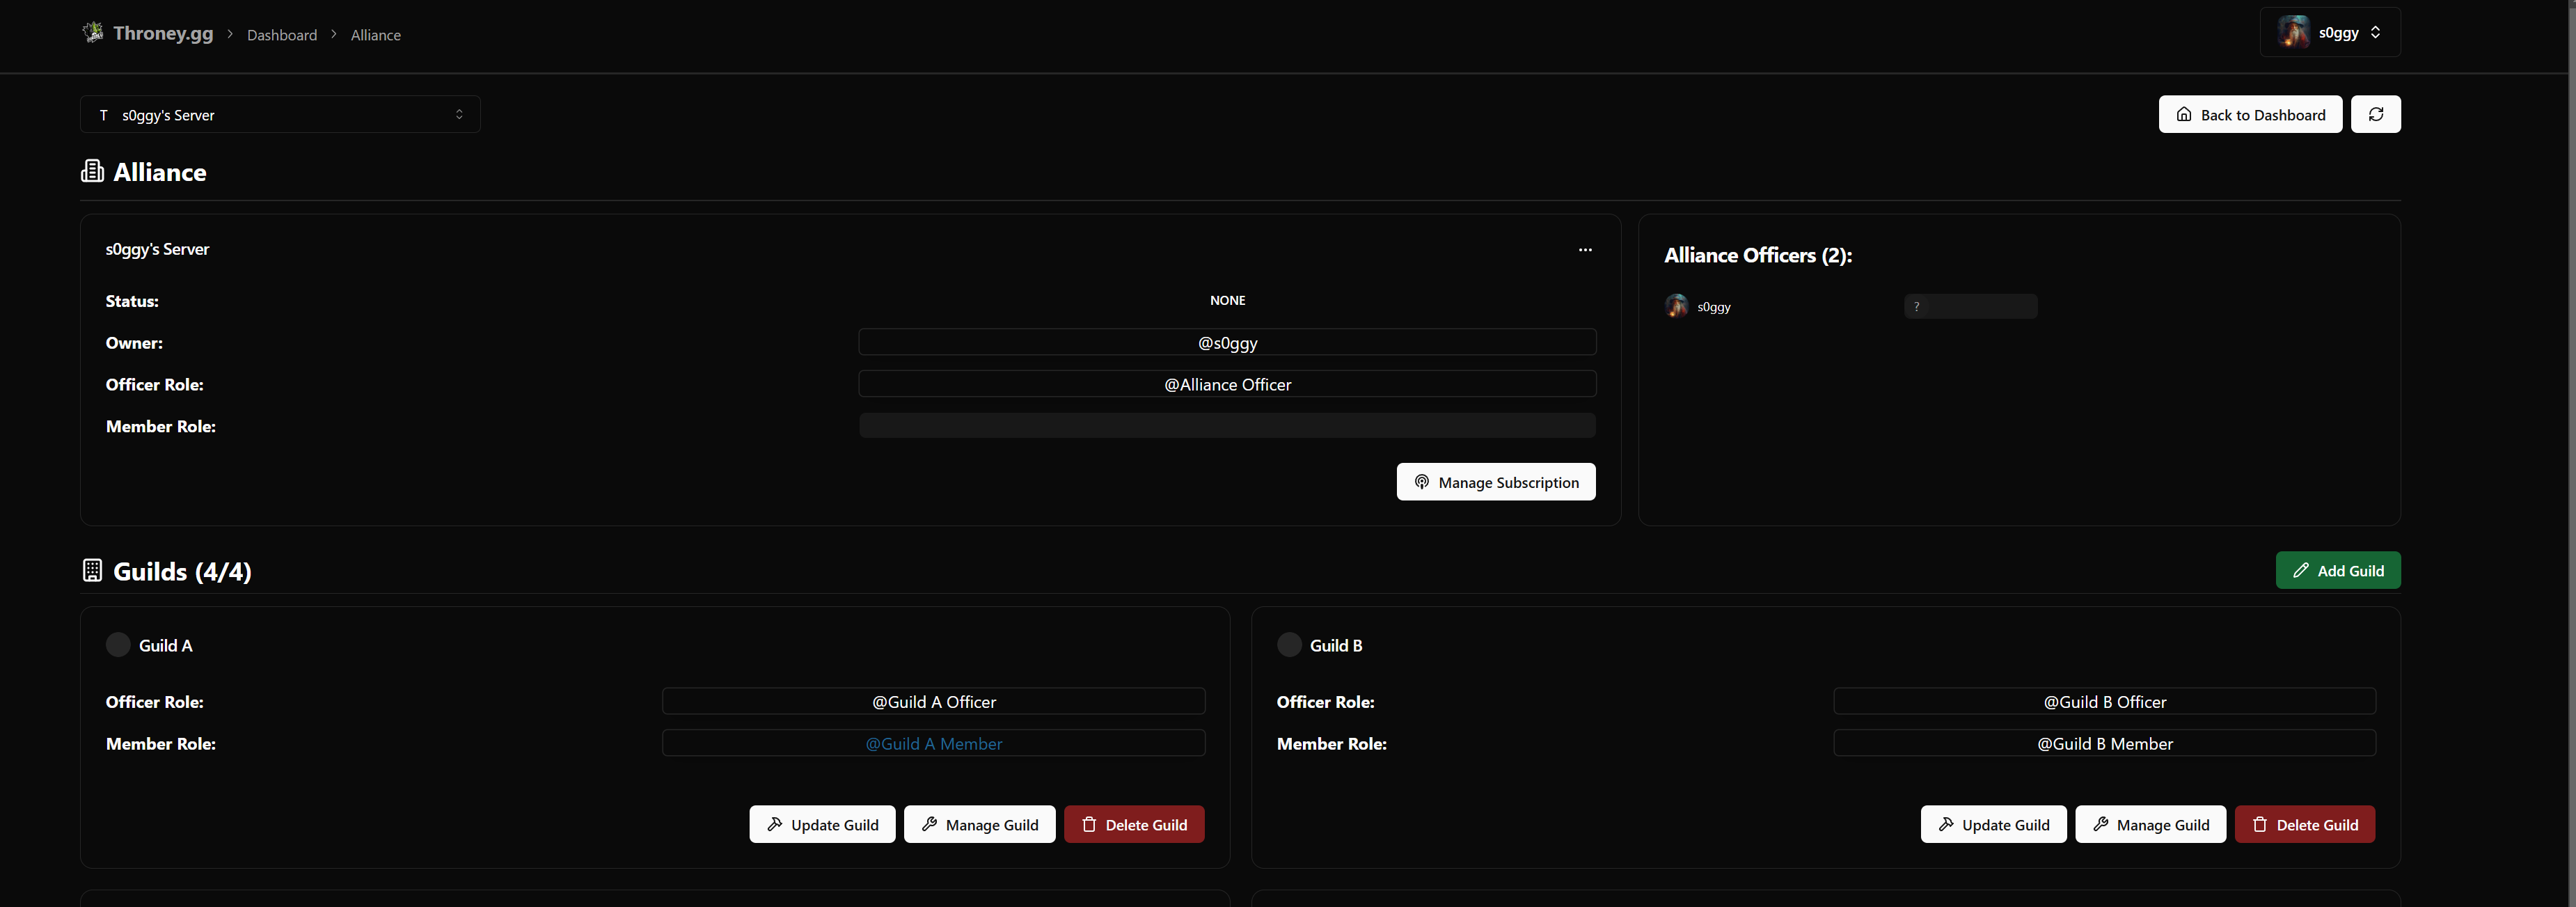
- Click “Update Guild” and select the correct member role for each guild.
- By default, only one guild is created. You can rename it or add additional guilds as needed.
Step 5: Upload Your Character Data
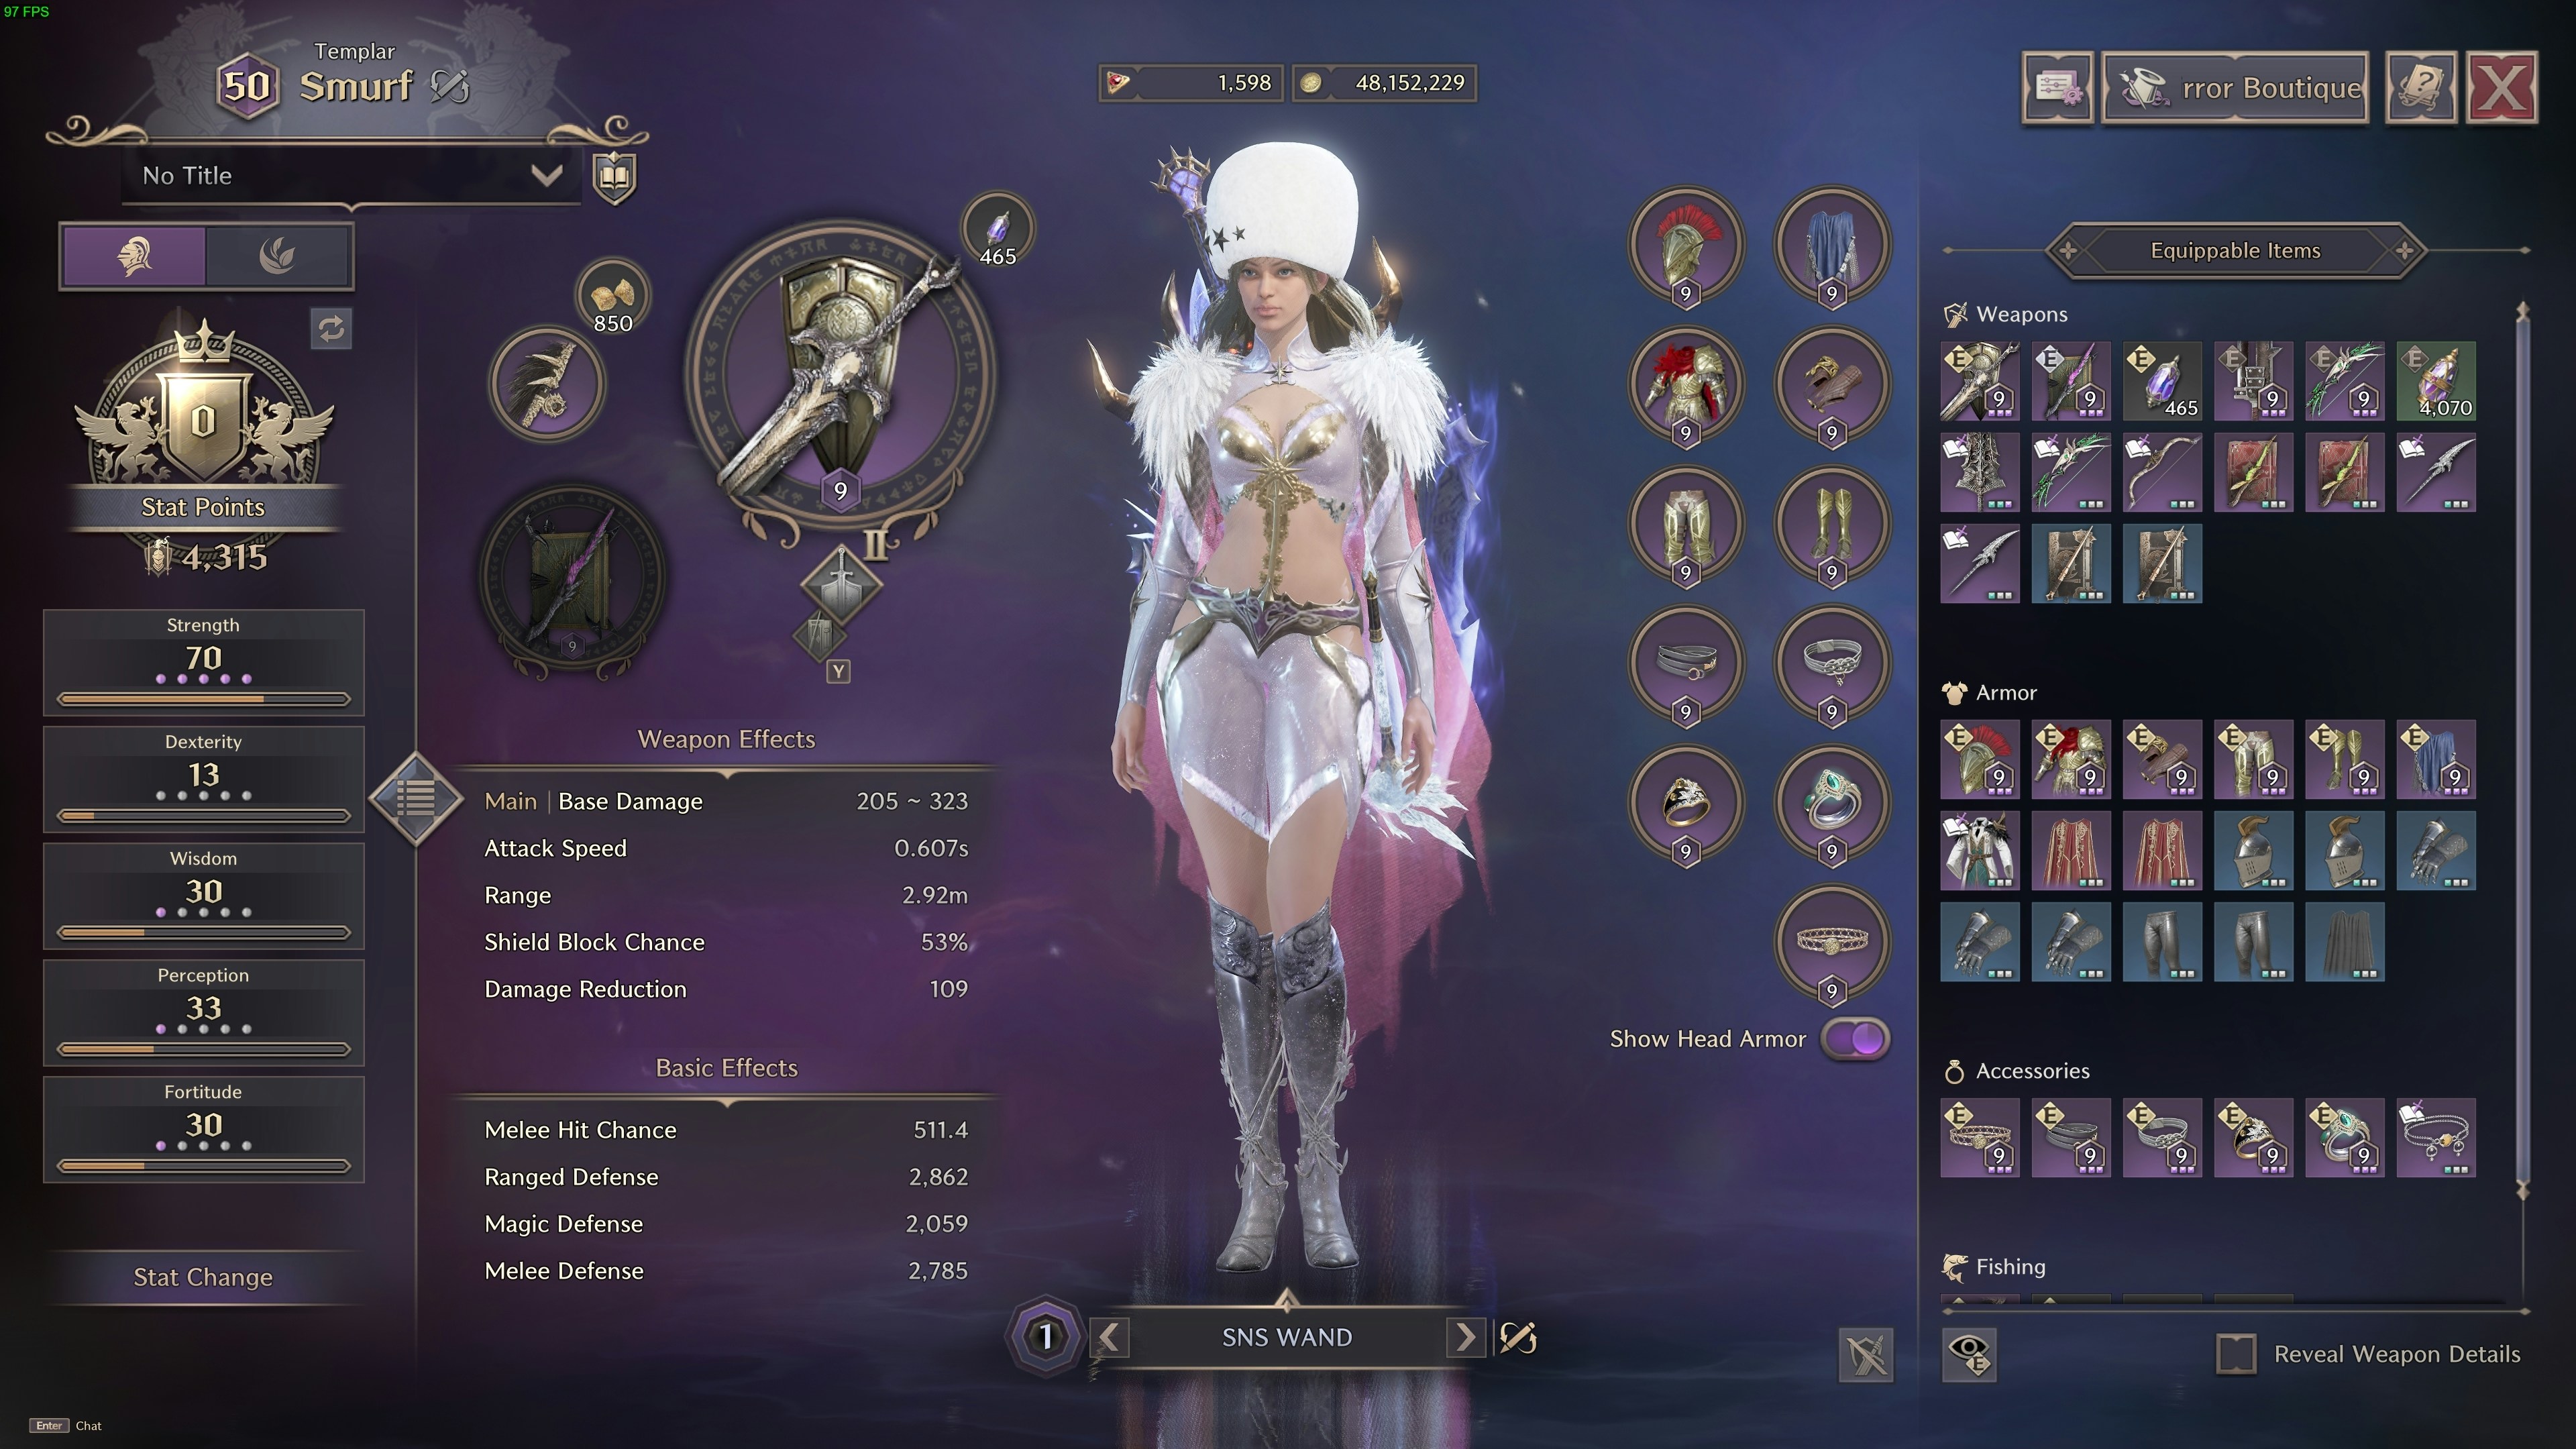
To start tracking members and event participation, upload your character profile by running the following command in Discord:- Attach a clear screenshot of your character page, ensuring all relevant details are visible.
- A valid character profile should look like this:
✅ Congratulations! You’re All Set! 🎉
Throney will now:- Automatically track attendance, events, and participation. for each user in the ecosystem
- Log data into the dashboard for officers to manage.
- Provide insights into guild and alliance composition.